What is Continuous Testing and why it is important.
In today’s fast-paced technological world, companies are under increasing pressure to deliver new features and enhanced products with consistent quality.
Continuous Testing is one of the best practices to start delivering higher quality software, faster.
According to its definition, Continuous Testing means testing an application continuously throughout the software development life cycle.
It is the process of running (automated) tests early and often – daily, even hourly – to obtain immediate feedback on the quality of a software release.
Continuous testing is used to constantly validate code as it changes, to primarily ensure there is no breaking or regression of it .
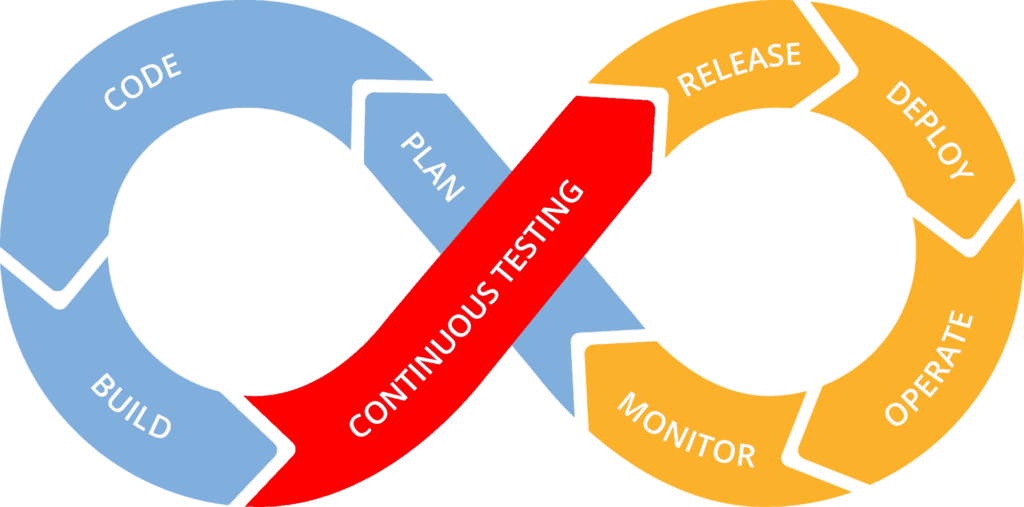
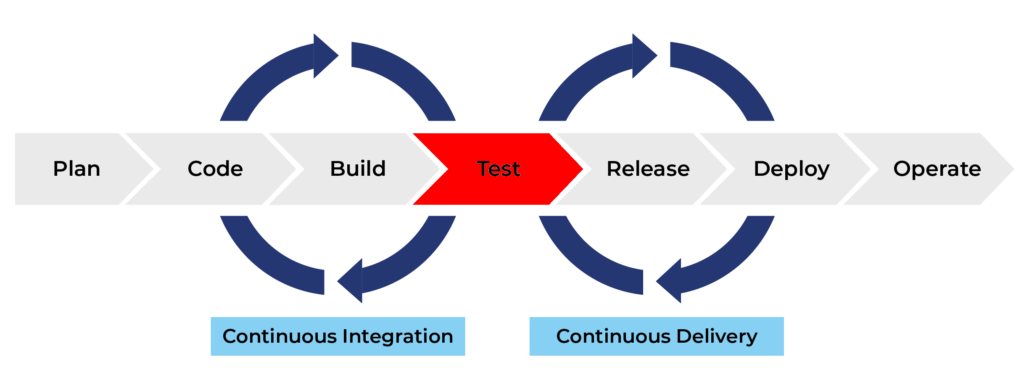
The term “Continuous Testing” is often used in conjunction with “Continuous Integration” (CI) and “Continuous Delivery” (CD).
Continuous Integration is a software development practise where developers regularly merge their code changes into a central repository, after which automated builds and tests are run.
Continuous Delivery is an extension of Continuous Integration where every code change is automatically prepared for release to production or to customers.
Clearly, CI/CD without Continuous Testing can’t work: they require Continuous Testing because, apart from velocity, the final aim is to deliver quality applications to users.
To combine quality and competitive times, test automation is an essential ingredient.
As the mantra is: “test early, test faster, test often and automate”, Continuous Testing cannot be done without test automation. It requires testing code at the moment it is built, and this can only be achieved if test automation is developed.
Every time a new feature is added and a new build is created, the software is subject to a full set of regression tests, while new tests are added to check the new feature. This is only possible using test automation, as doing it manually is infeasible. Meaning that to achieve effective continuous testing, organizations must first adopt test automation.
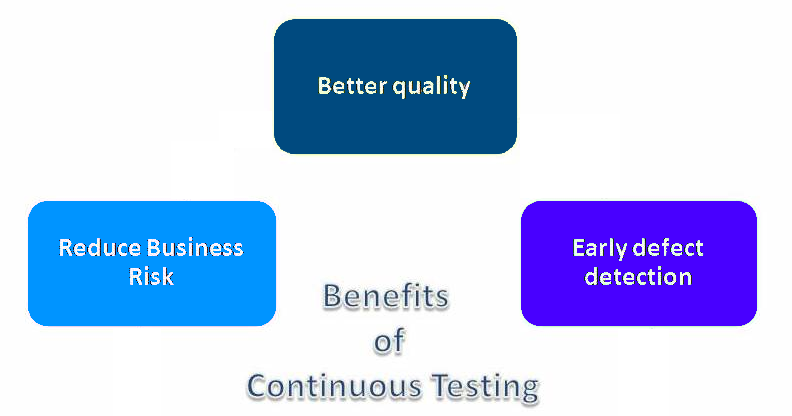
The benefits of continuous testing are various but the main one is that it allows us to uncover defects as soon as they are introduced, thus reducing the costs in finding and fixing defects together with the risks of a bad customer experience.
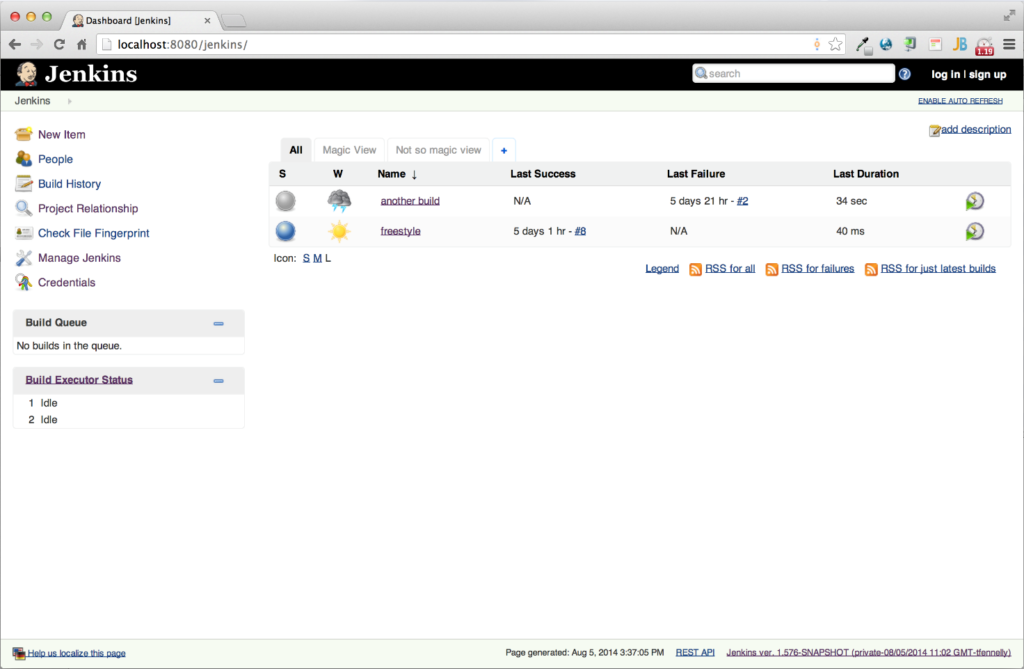
Continuous Testing with Jenkins
Jenkins is a free and open-source automation server supporting Continuous Integration and Continuous Delivery. It helps to automate the process of building, testing and deploying software applications.
Jenkins allows executing a user-defined list of tasks, called “jobs”, such as compiling the code, building the executable, running automated tests, etc. basing on time or events based triggers. For example, it is possible to compile the application code every 30 minutes or right after a new commit has been pushed to the software repository.
With Jenkins, an application is built and tested immediately after developers commit the code (Continuous Integration). Since the code is built and tested after each commit, it is easy to detect which code caused a build or test to fail (fault isolations). After every successful build and test cycle, the code is deployed to the production environment (Continuous Delivery).
Jenkins has a rich plugin ecosystem that gives users a lot of added features outside of the ones already provided by Jenkins’ installation. These plugins help to extend Jenkins, integrating it with their own development, testing and deployment tools.
Jenkins supports continuous testing and test automation. It helps users repeat their own automated tests on a regular or triggered cycle, to check if any functionality is impacted by the changes made.
Jenkins has multiple advantages, including:
– open-source and free
– easy to install, configure, and use
– plugins and integrations
– …
Getting Started with Jenkins and Maveryx
Jenkins comes with a built-in test harness based on the JUnit test framework. The same happens for Maveryx. This means that Maveryx natively integrates with Jenkins.

Maveryx does not require to capture the application user interface to create and run tests. This makes it ideal for continuous testing. Test scripts written with Maveryx can be executed as soon as a new commit is made, providing immediate feedback to developers and managers.
Maveryx tests can be run automatically in Jenkins in many different ways, for example through Ant or Windows Batch Command.
To achieve this goal through Ant, first of all, an Ant build file of the Maveryx test project is needed.
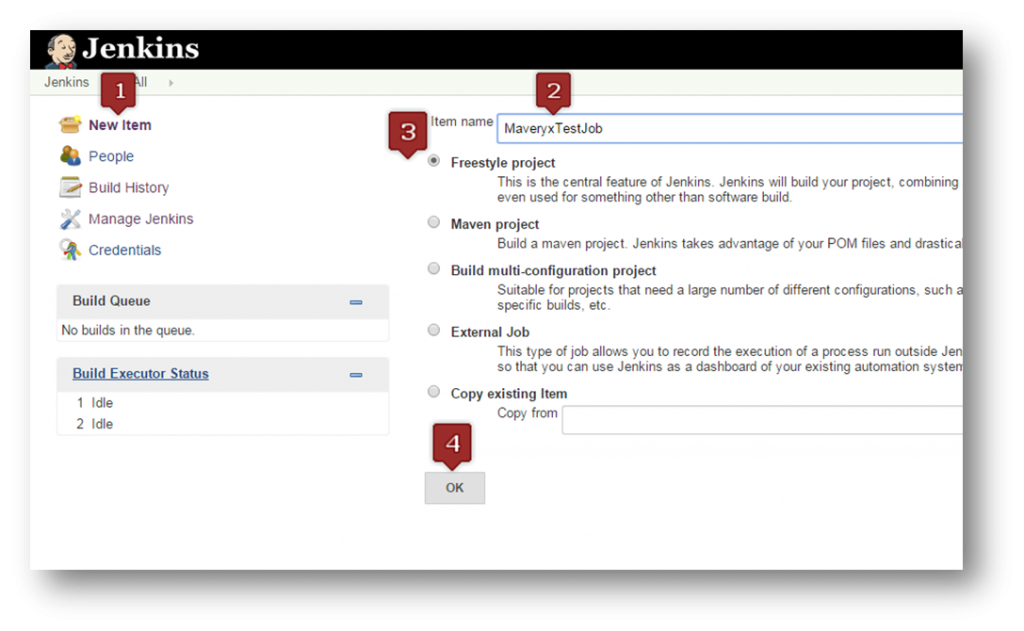
To create a Jenkins Job, in the Jenkins Dashboard:
1) click New Item;
2) set Item Name (e.g. MaveryxTestJob);
3) select Freestyle project;
4) click OK.
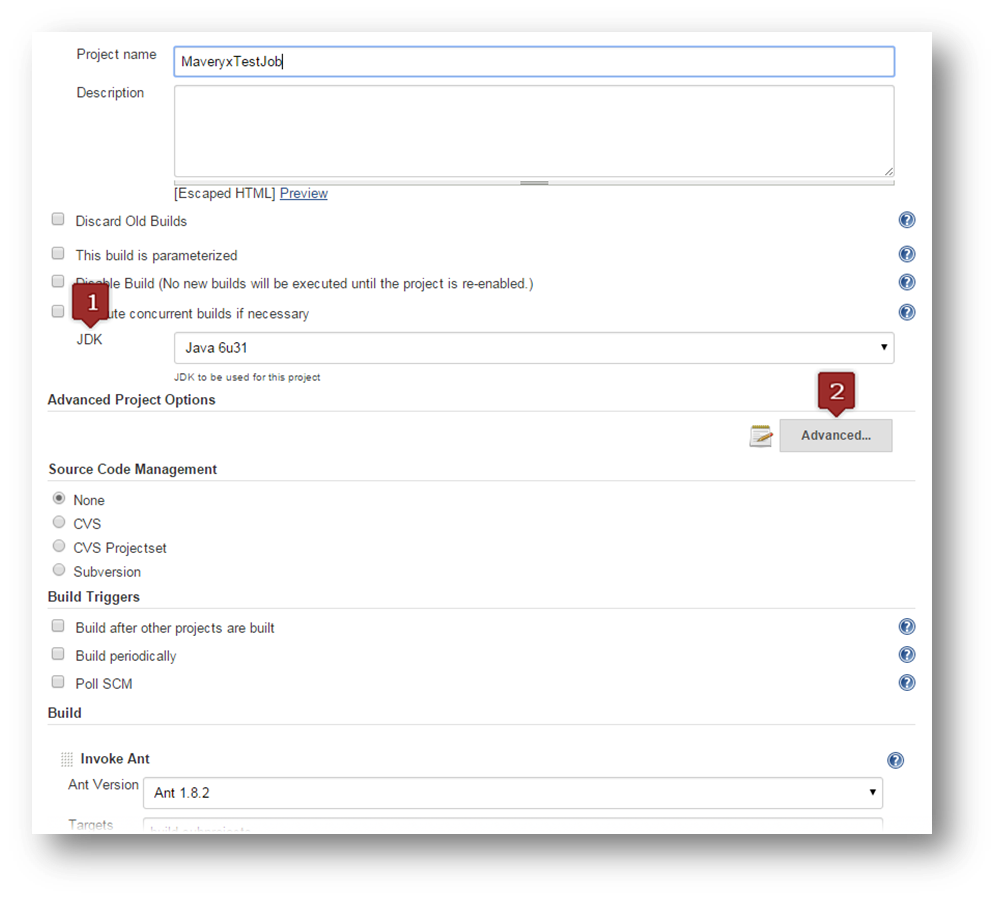
The next step is to configure the Job according to the Ant build.xml file:
1) select the JDK to use;
2) click Advanced.
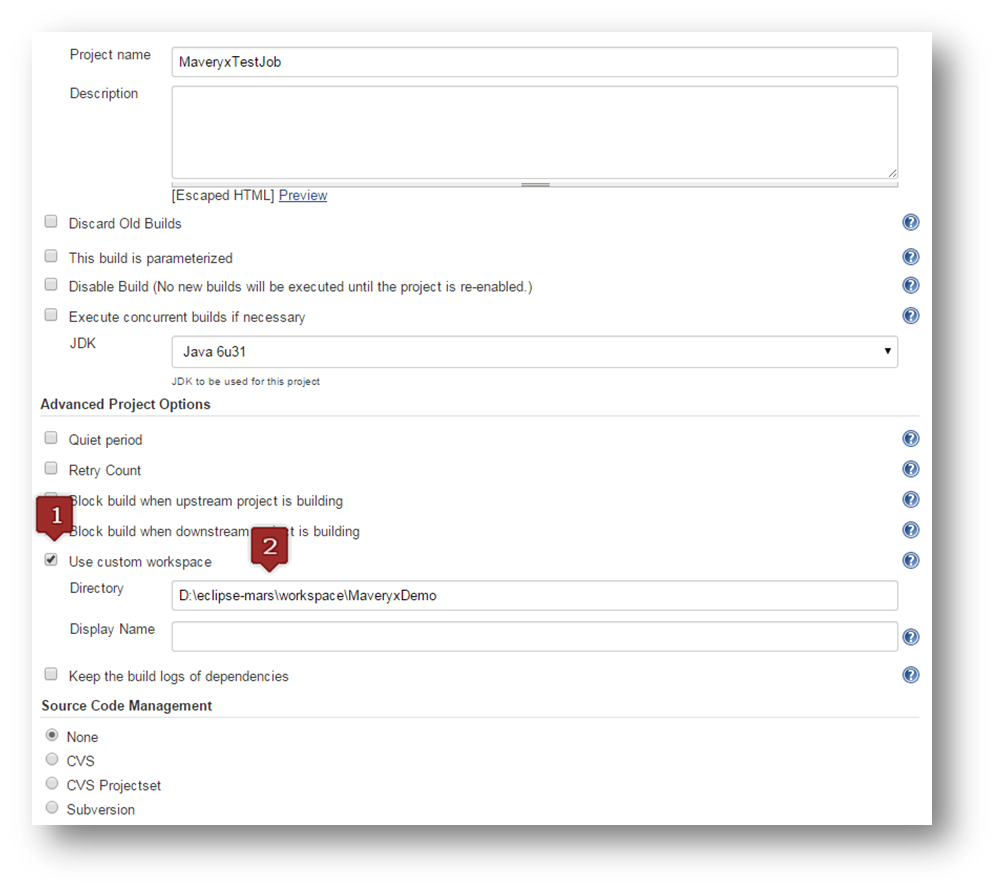
In the Advanced Project Options section:
1) select Use custom workspace;
2) set Directory to the path of the folder containing the project (the build.xml file).
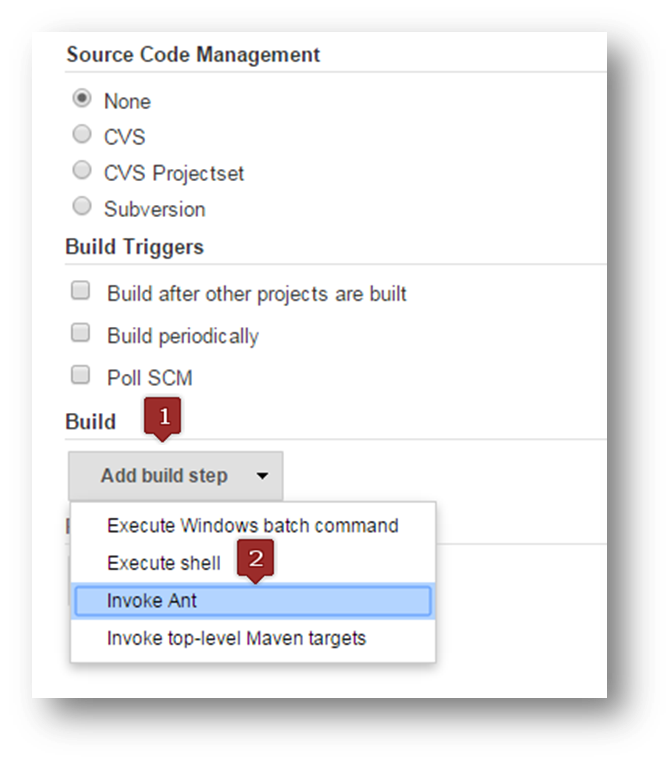
In the Build section of this page:
1) click Add build step;
2) select Invoke Ant.
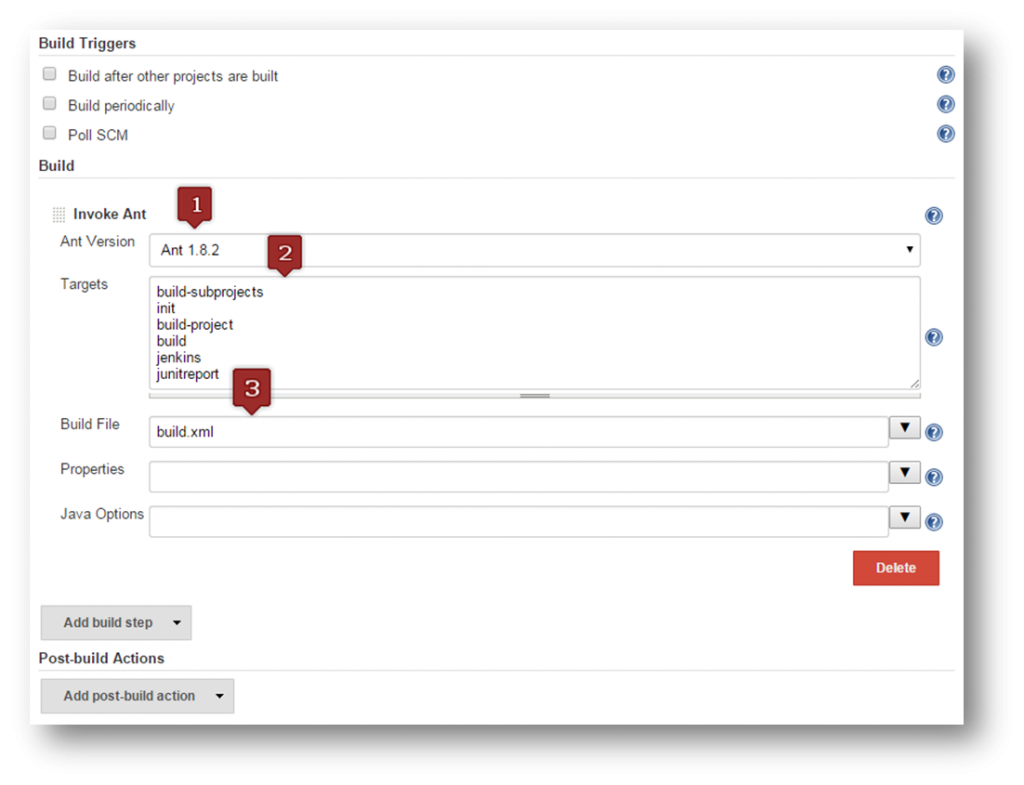
Now it’s time to set the Ant version and the targets in the Invoke Ant section:
1) select Ant Version;
2) set Targets to
build-subprojects
init
build-project
build
jenkins
junitreport;
3) set Build File to build.xml.
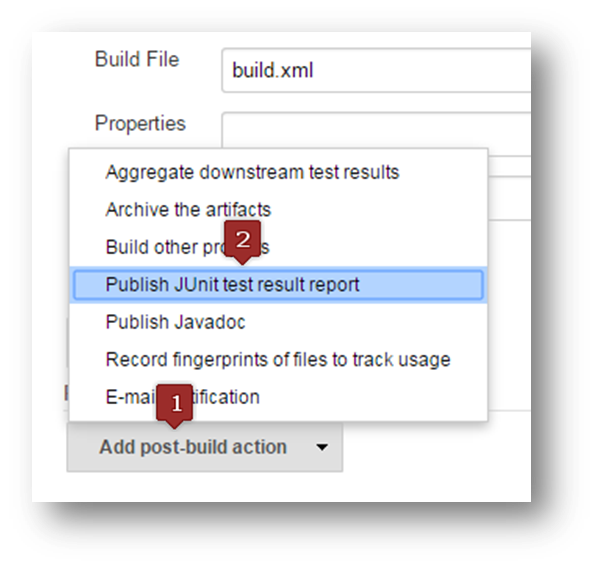
In the Post-build action section:
1) click Add post-build action;
2) select Publish JUnit test result reports;
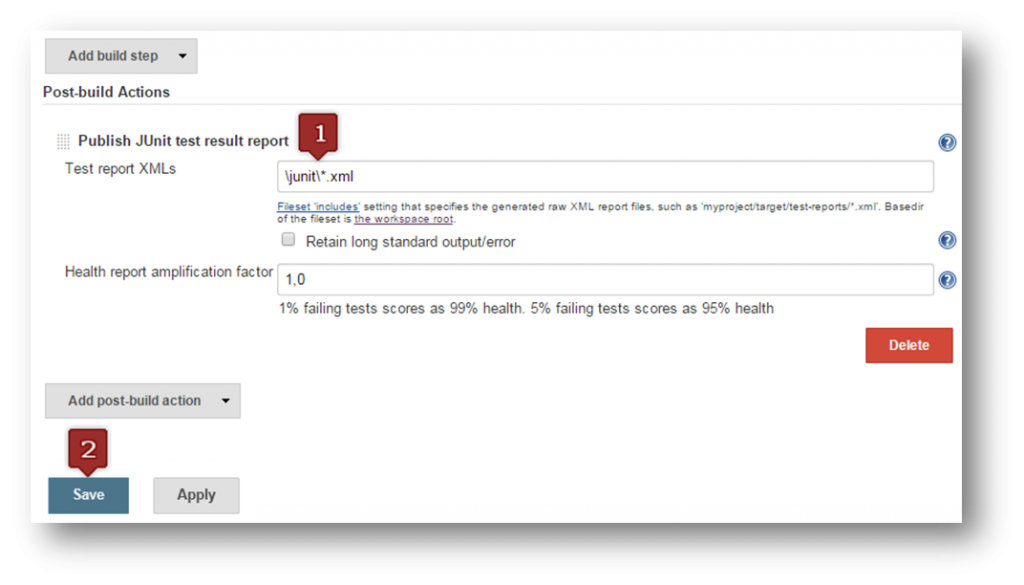
In the Publish JUnit test result report section:
1) set Test report XMLs to
\junit\*.xml;
2) click Save;
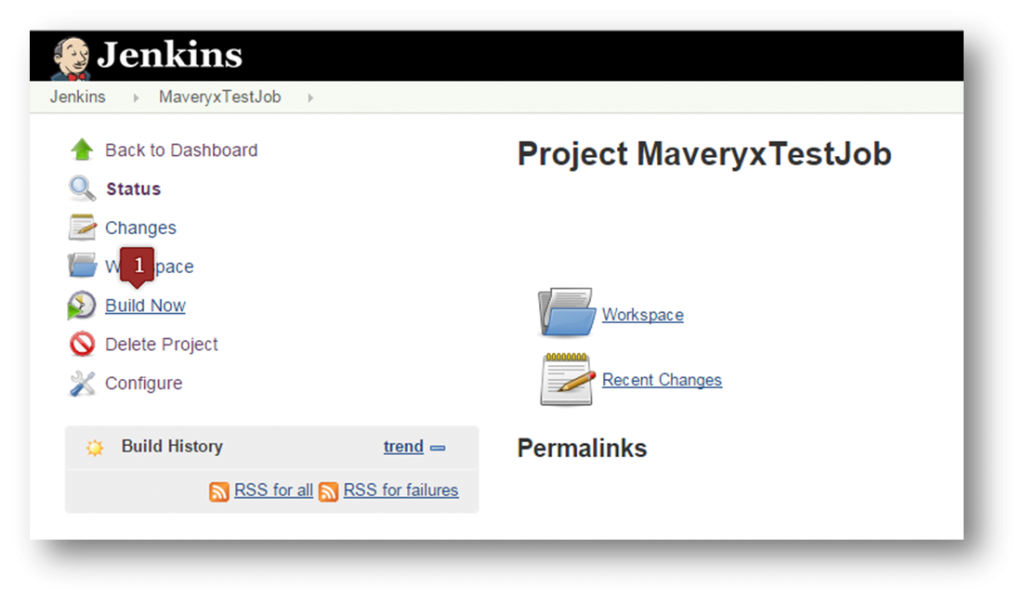
Finally, it’s time to build and run the tests. In the Project Dashboard just click Build Now to run the tests (1).
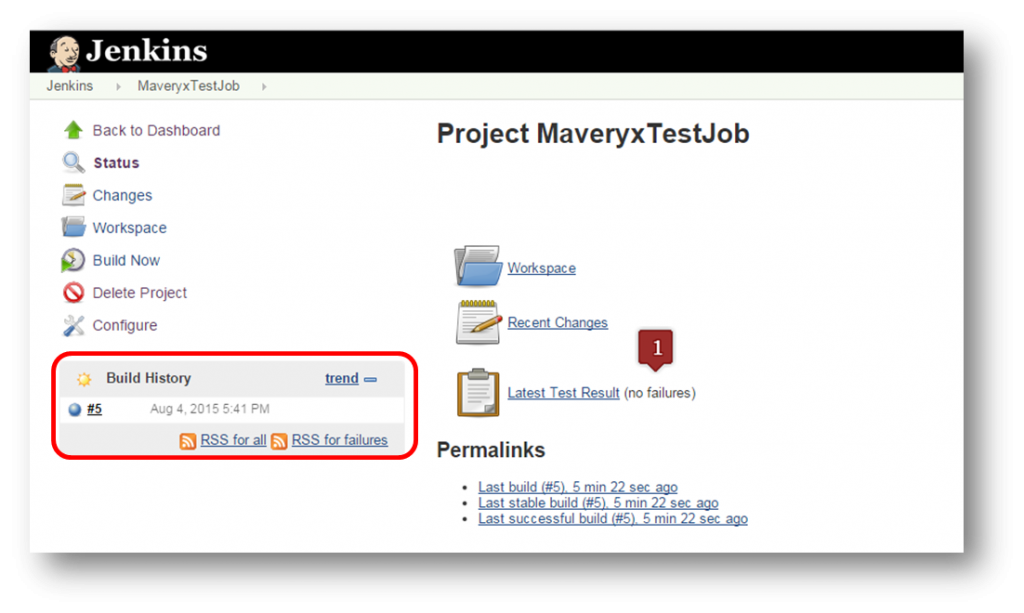
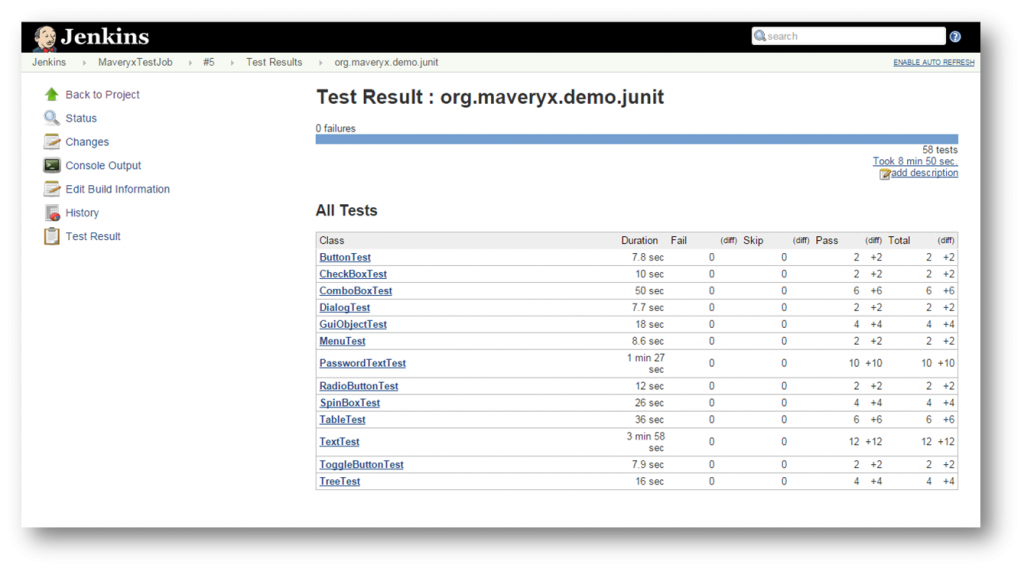
When the job finishes click on Latest Test Result to see the test report (1)
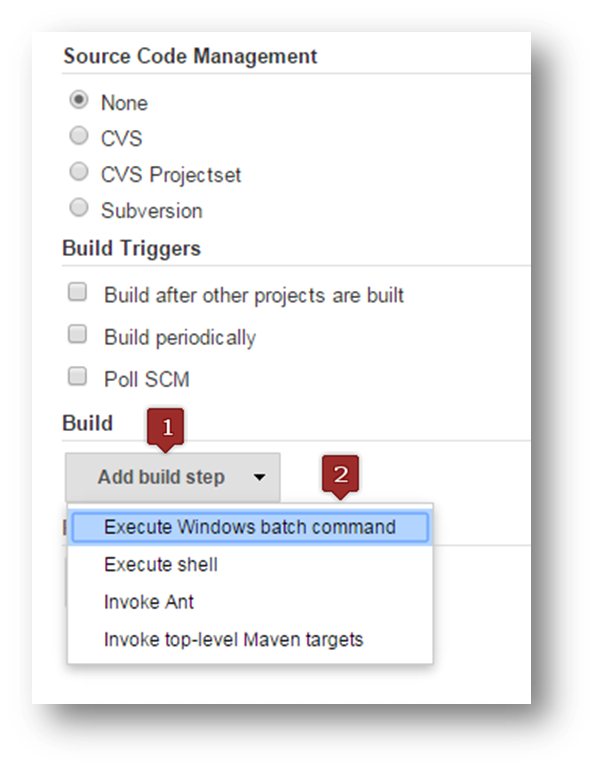
At the same time, if you want to achieve this goal through Windows Batch Command, in the Build section of the Job configuration page’s Advanced Project Options section:
1) click Add build step;
2) select Execute Windows batch command;
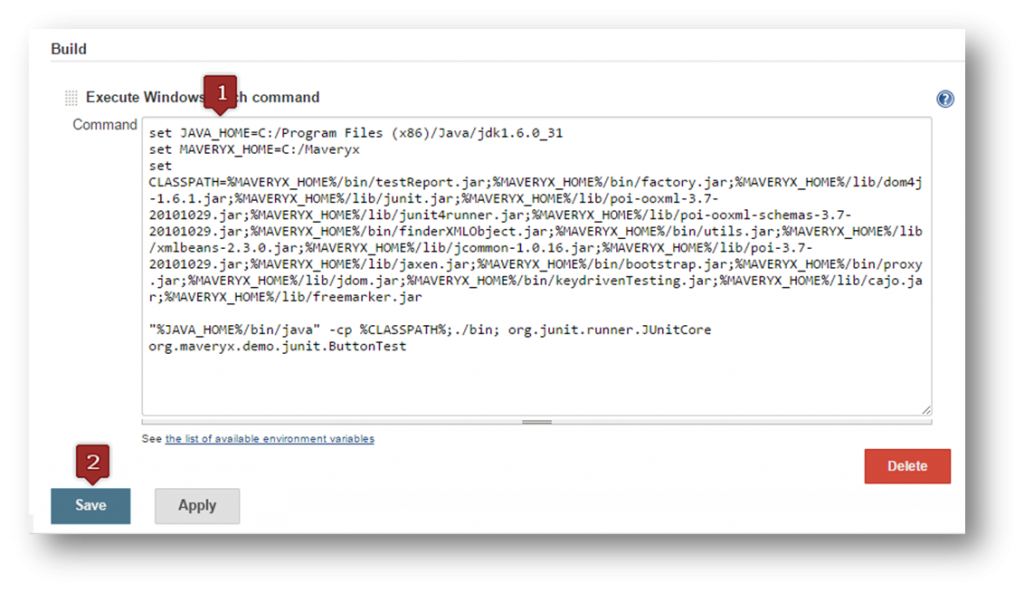
In the Execute Windows batch command section:
1) set command as in the following figure;
2) click Save;
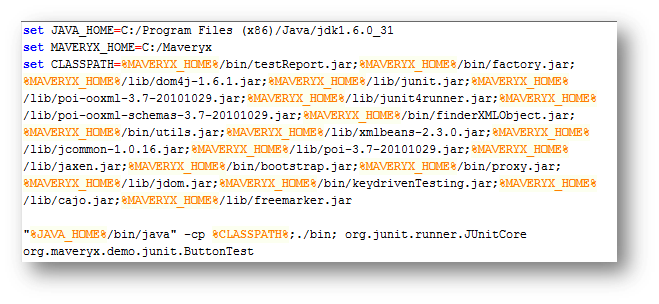
Let’s take a closer look at the batch command:
1) set JAVA_HOME to your JDK installation directory
2) set MAVERYX_HOME to your Maveryx installation directory
3) set the CLASSPATH as in figure
4) set the java command specifying the test class to run
To build and run the tests, in the Project Dashboard just click Build Now to run the tests
Conclusion
The need for more rapid, responsive development cycles has led many organizations to adopt continuous integration & continuous development to speed up and automate their software life cycle.
CI/CD enables daily, even hourly, software updates and requires Continuous Testing to verify the code with every change. Continuous testing involves the execution of automated tests as part of the software delivery pipeline. Jenkins and Maveryx help in continuous testing and test automation as they enable organizations to accelerate their software development process through automation.
External links
https://en.wikipedia.org/wiki/Continuous_testing
https://martinfowler.com/articles/continuousIntegration.html