Easy and fast CI with Jenkins & Ant
Continuous Integration (read more about CI in Maveryx) is often applied in environments with automated build and/or automated test execution systems, such as Jenkins, also using tools for automating software build, such as Ant.
Of course, Maveryx tests can be run automatically in Jenkins, among other ways, with Ant.
To do this, you just need to perform the following steps:
1) first, create a Maveryx tests project,
2) then, create an Ant Build file that executes the tests of the project,
3) eventually, set up a Jenkins job that runs the tests & publishes the results.
The following example is made by using the IDE Eclipse and the Maveryx-Eclipse Plugin.
Run Configuration
Let’s suppose you already have your Maveryx test project, and its name is MaveryxDemo.
Easily create a Run Configuration as follow:
1) right-click on the package you want (e.g. org.maveryx.demo.junit),
2) then, click Run As,
3) and click Run Configurations…

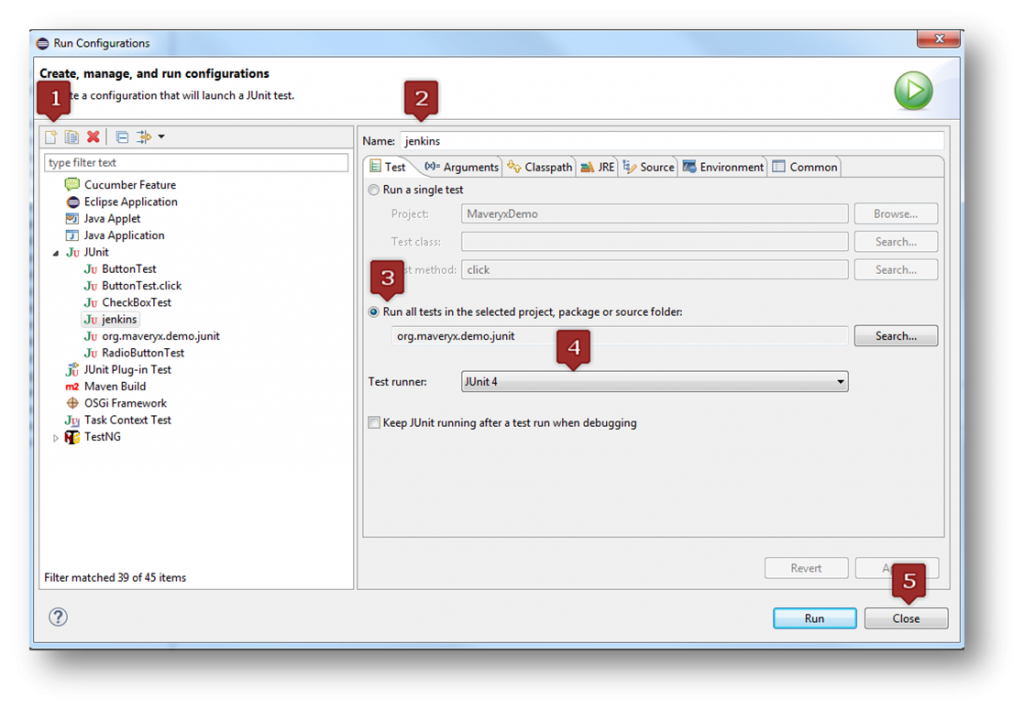
Once in the Run Configurations window:
1) click New Launch Configuration,
2) set Name (e.g. Jenkins),
3) click Run all tests in the selected project, package or source folder,
4) then set Test Runner to JUnit4,
5) and click Close
Ant Build File
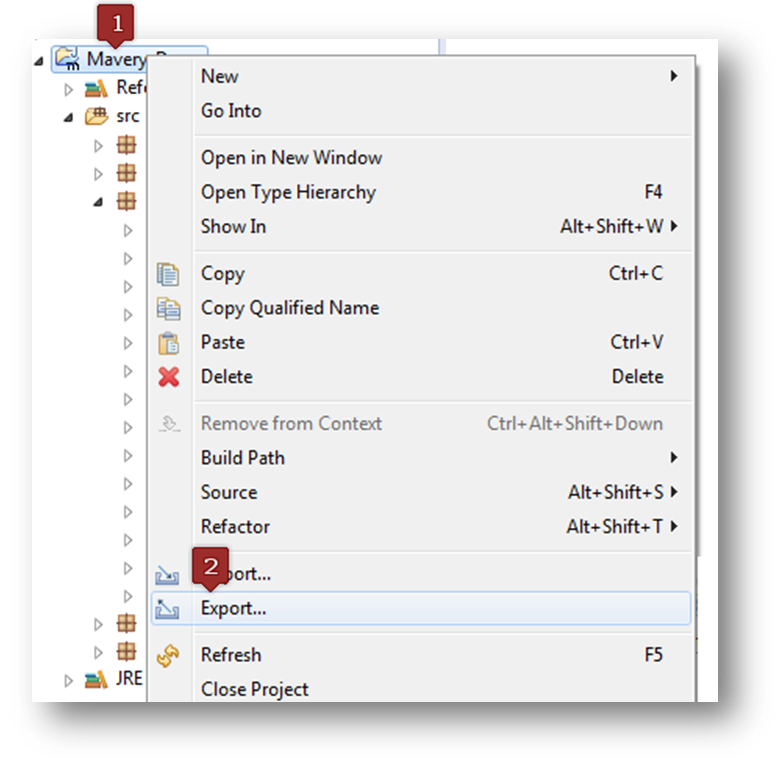
At this point, it’s time to create the Ant Build file. So, in the Package Explorer view
1) right-click on MaveryxDemo
2) and click Export…
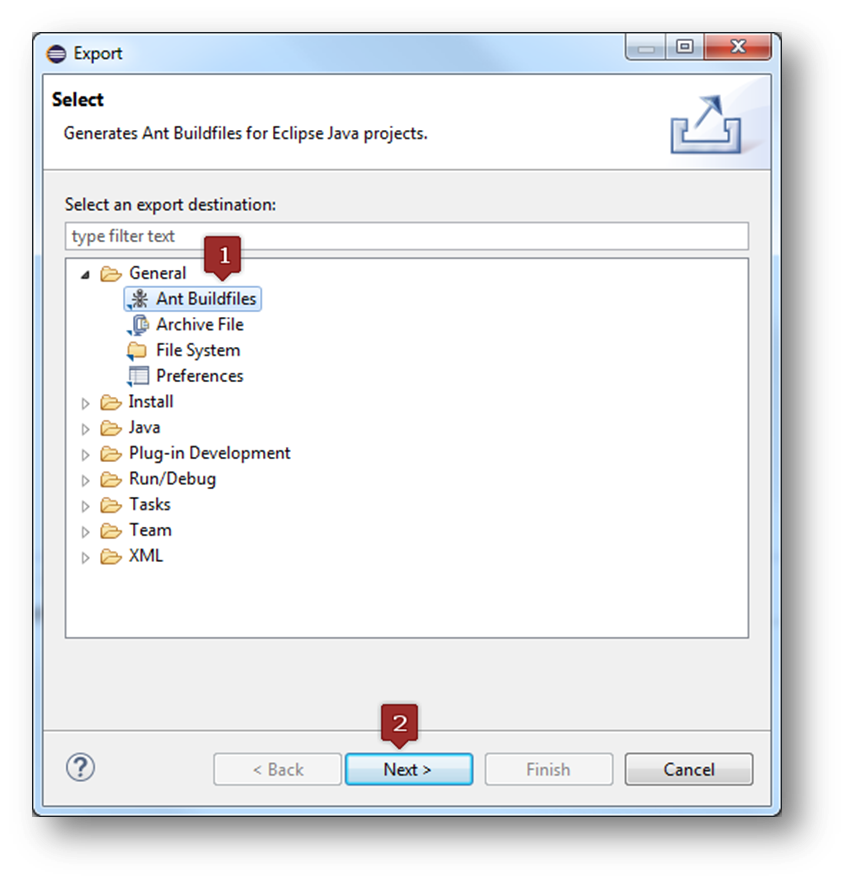
In the Export Wizard Select dialog:
1) click General -> Ant BuildFile
2) click Next
Eventually, in the Export Wizard Generate Ant BuildFiles dialog:
1) select (check) MaveryxDemo,
2) then uncheck Create target to compile project using Eclipse compiler,
3) and click Finish.
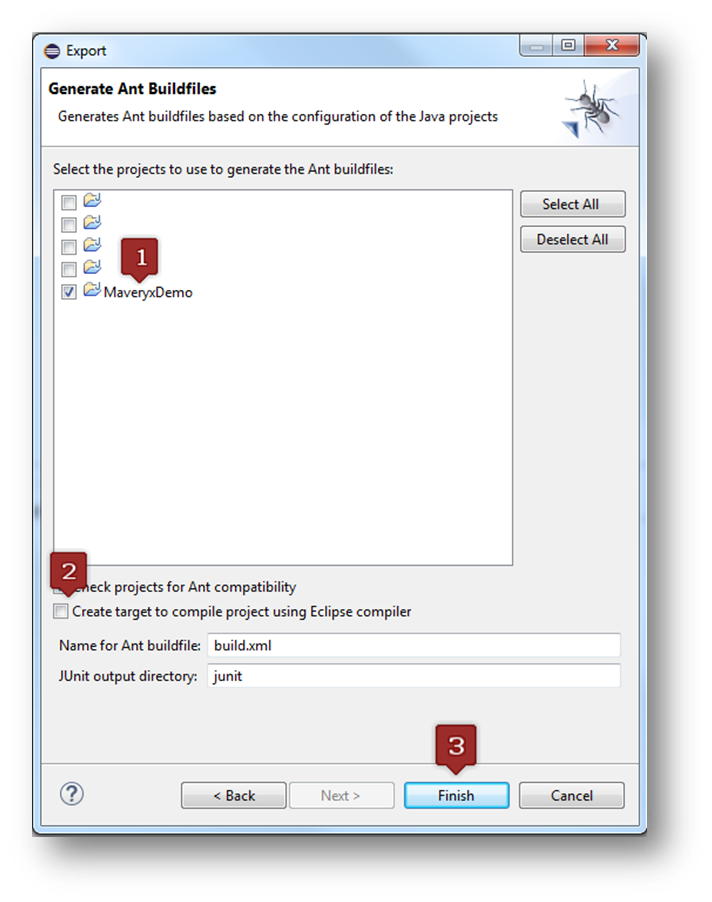
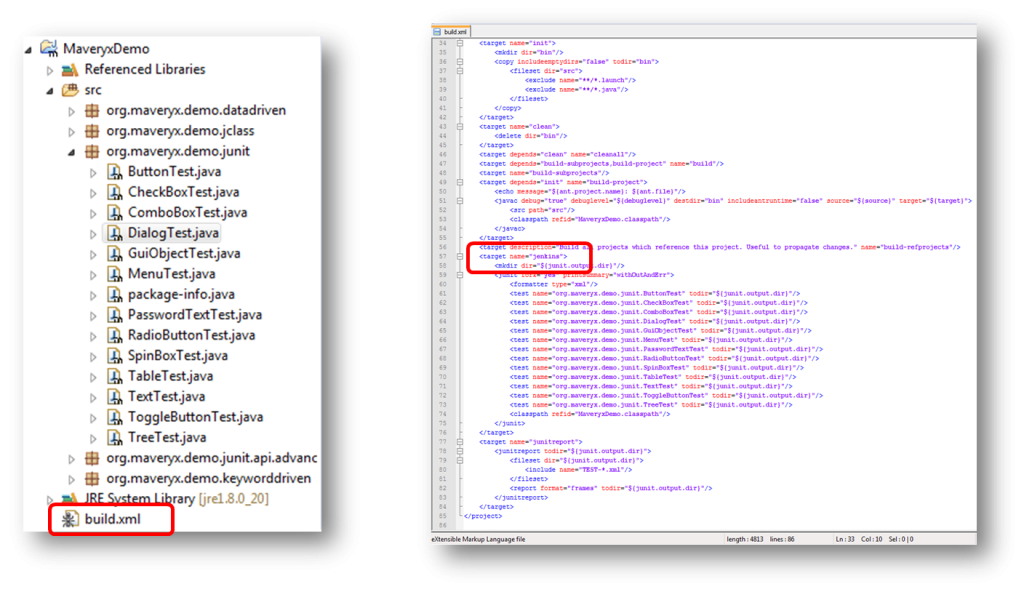
At this point, you should have your Ant build file in your project (build.xml).
Create the Jenkins Job & Invoke Ant
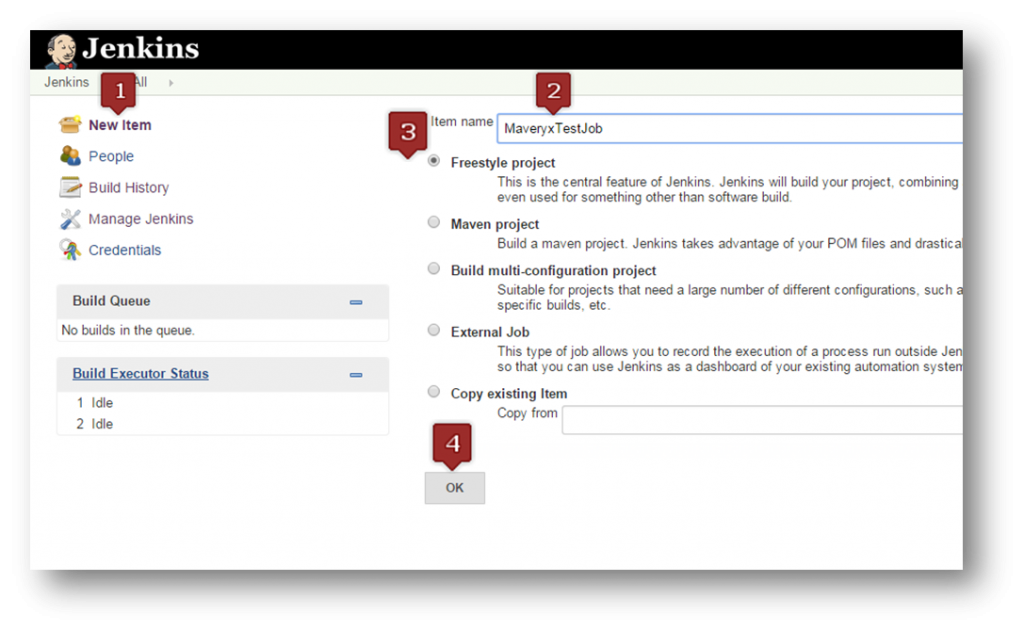
Now, it is finally time to create a Jenkins Job. so, in the Jenkins Dashboard:
1) click New Item
2) then, set Item Name (e.g. MaveryxTestJob)
3) now, select Freestyle project
4) and finish by clicking OK.
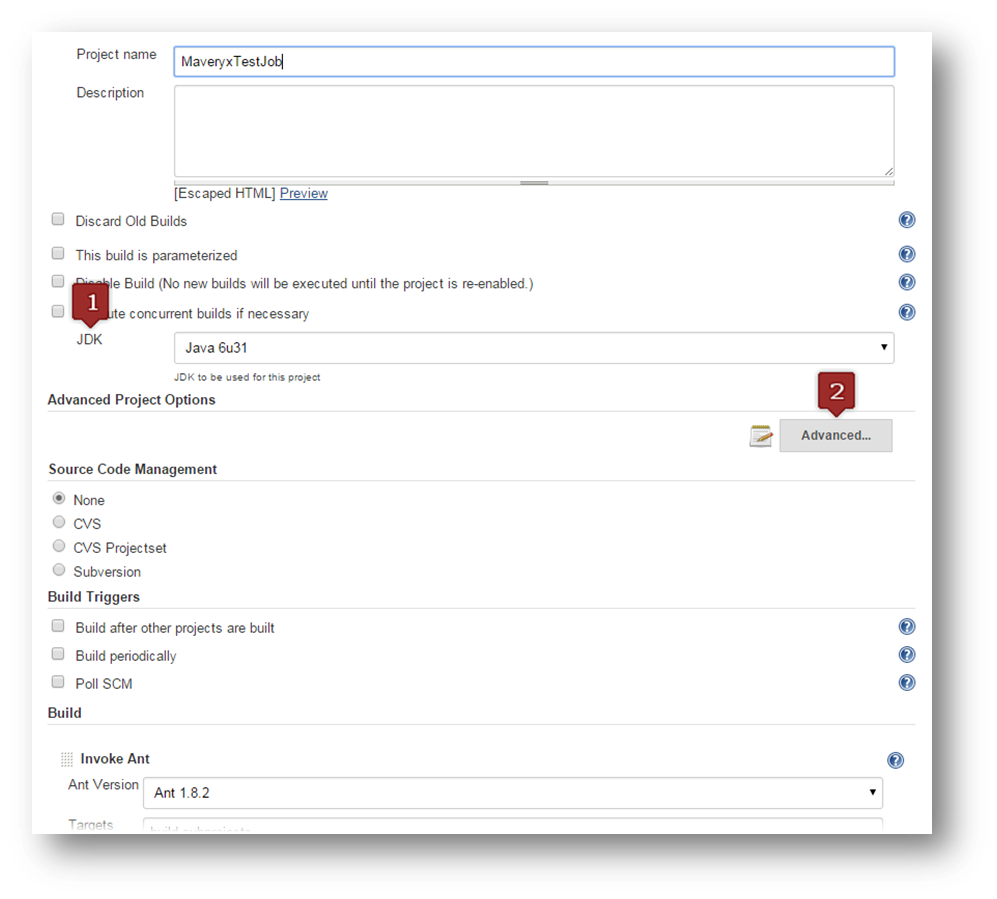
Of course, now, you have to configure the Job. Obviously, in the Job Configuration page:
1) select the JDK to use, according to the Ant build.xml file,
2) and click Advanced…
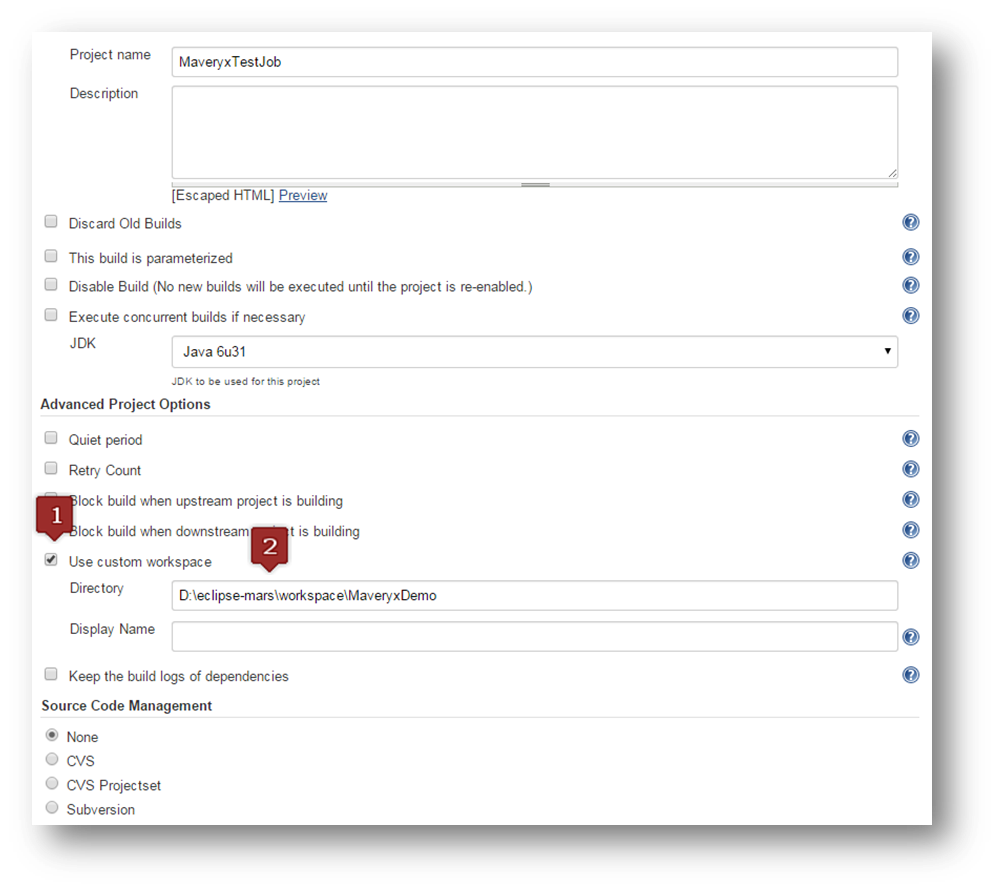
More, in the Advanced Project Options section of the page:
1) select (check) Use custom workspace
2) and set Directory to the path of the folder containing the Eclipse project (the build.xml file)
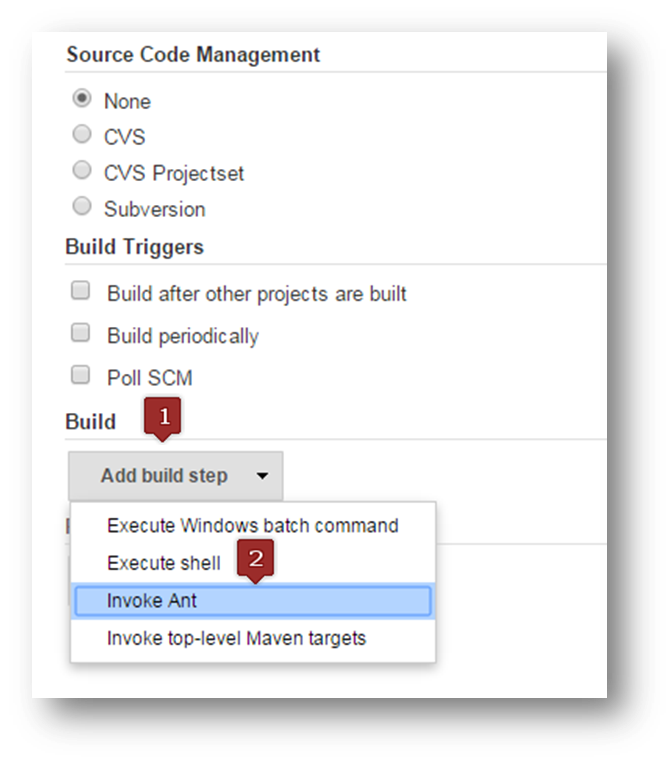
In the Build section of the page:
1) click Add build step
2) and, of course, select Invoke Ant.
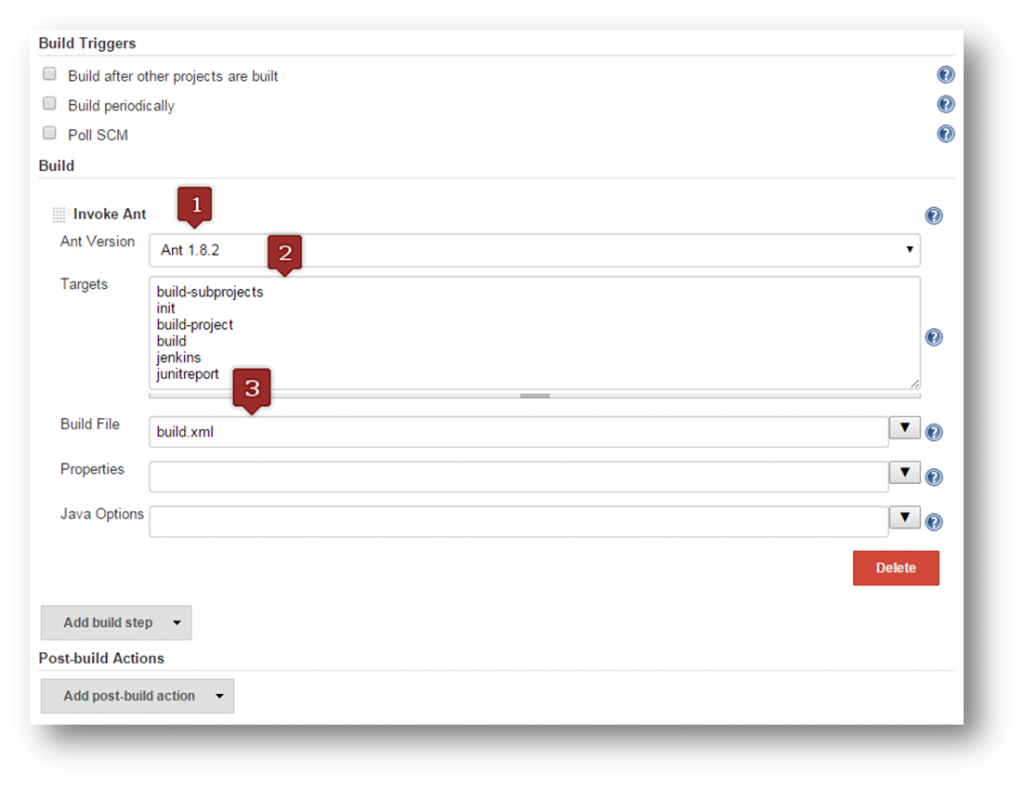
So, in the Invoke Ant section of the page:
1) select Ant Version to be used,
2) then set Targets to
build-subprojects
init
build-project
build
jenkins
junitreport
3) and set Build File to build.xml
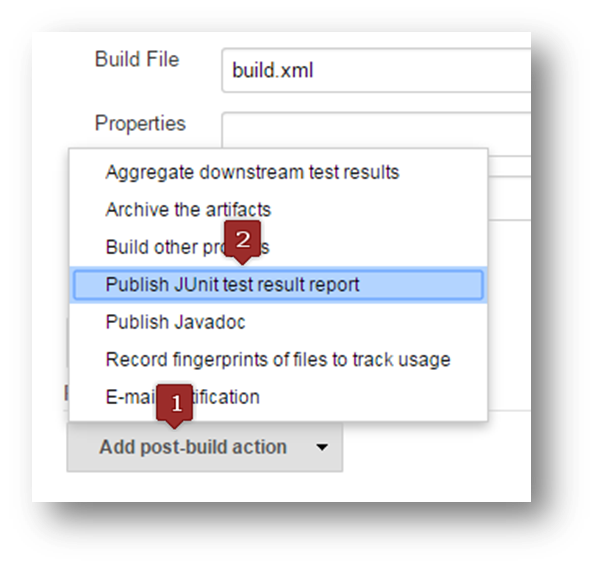
Now, in the Post-build action section:
1) click Add post-build action
2) and select Publish JUnit test result reports
Eventually, in the Publish JUnit test result report section:
1) set Test report XMLs to
\junit\*.xml
2) and click Save.

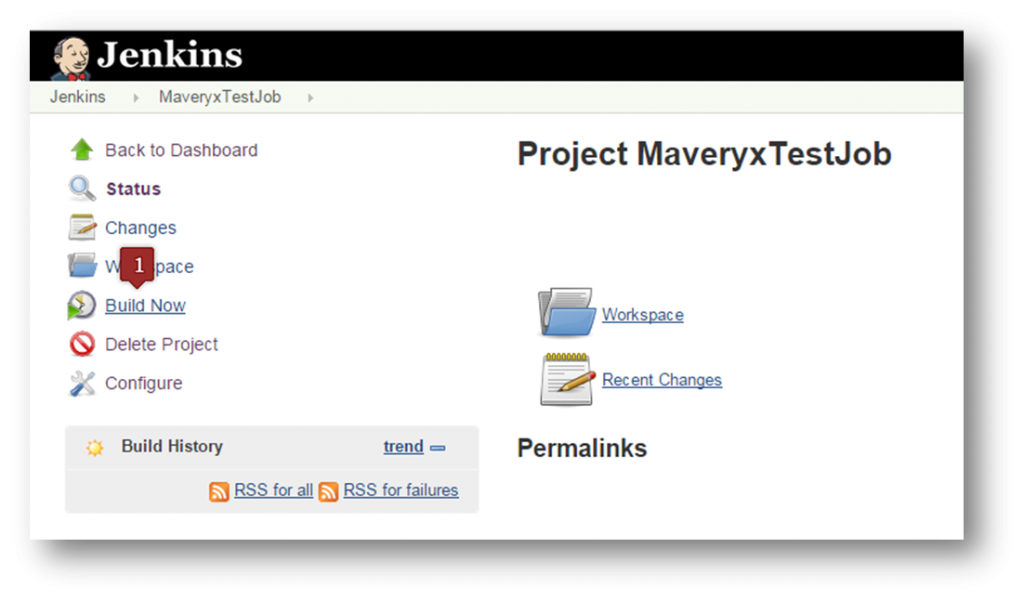
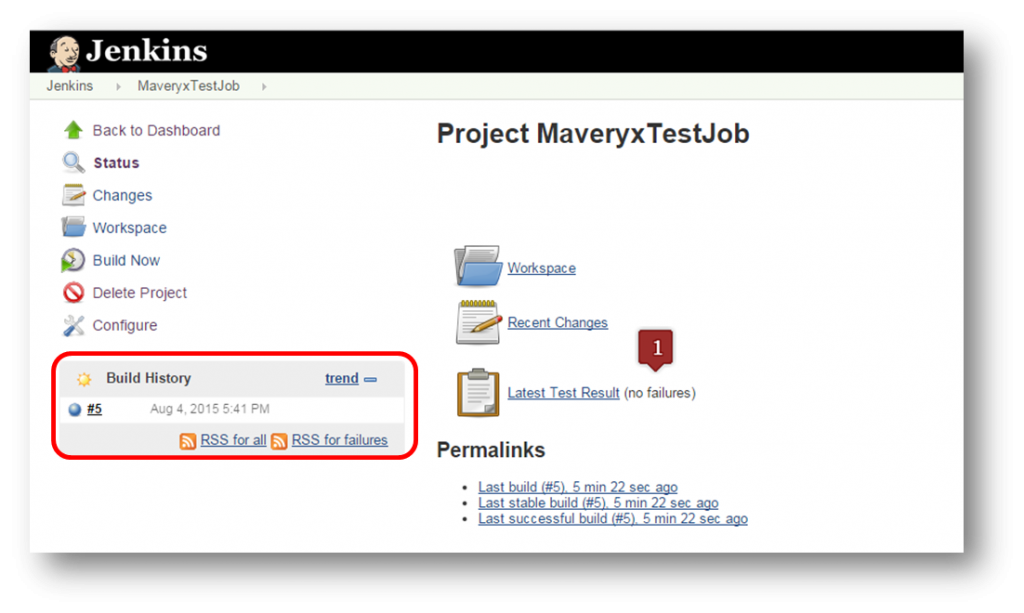
Jenkins Build and Run
Now, it’s finally time to build and run the tests. So, in the Project Dashboard:
1) just click Build Now to run the tests.
Of course, the stripy progress bar, in the Build History section, indicates that the tests are running.
When the job finishes, if everything went fine (no failures) of course, the sphere in the Build History box becomes solid blue. Obviously, this means the build was a complete success.
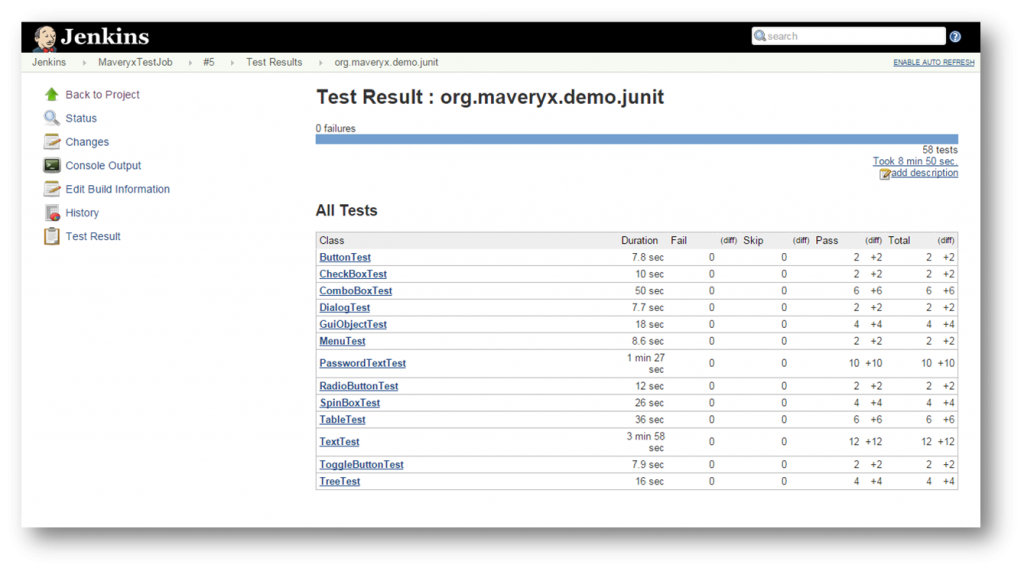
At this point, just click on Latest Test Result to see the test report.
This example can not cover all the things to say about the topic. If you are interested don’t be shy and feel free to ask and contribute.